Source: sevenforums.com
This will show you how to restore your Windows 7 hard disk back to exactly how it was when you created asystem image backup.
- You can only do a system image recovery to a HDD that is the same size or larger than the one the system image was created from. You will not be able to do a system image recovery to a smaller HDD.
- When you restore your computer from a image backup, it is a complete restoration. You can't choose individual items to restore, and all of your current programs, system settings, and files are replaced.
- If your backup image is on a external device (ex: USB drive), then make sure it is connected before starting. If USB drive, then also make sure that you have your BIOS settings (ex: Legacy USB) set to allow USB devices at boot.
- A system image recovery will format everything on each hard drive that was included in a system image, and will only restore what is included (see steps 7-9 in STEP TWO below) in the system image back. Be sure to backup anything that you do not want to lose that is not included in the system image backup first.
 STEP ONE
To be able to have multiple versions of system images saved on the same drive or partition, you would need to rename the older WindowsImageBackup folder from the previously created system image as described in the NOTE box at the top of this tutorial.
If you renamed the WindowsImageBackup folder for the system image version that you wanted to restore, then you will need to do the steps below before you will be able to restore that system image.
If you renamed the WindowsImageBackup folder for the system image version that you wanted to restore, then you will need to do the steps below before you will be able to restore that system image.
1. If you are "Able to Boot" into Windows 7A) In Windows Explorer, navigate to the renamed (drive letter)\WindowsImageBackup folder location of the system image that you want to restore.2. If you are "Not Able to Boot" into Windows 7
B) If you already have a folder named WindowsImageBackup that is not the system image version that you want to restore, then you will need to right click on it, click on Rename, and type in say WindowsImageBackup-Copy-2 as an example.
C) Now, right click on the renamed system image version (ex: WindowsImageBackup-Copy-1) that you did want to restore, click on Rename, type in WindowsImageBackup an press enter.
D) Go to the STEP TWO section below to do the System Image Recovery.A) If you have the system image backup save to an external device, be sure that it is connected now.
B) Open a command prompt at boot.
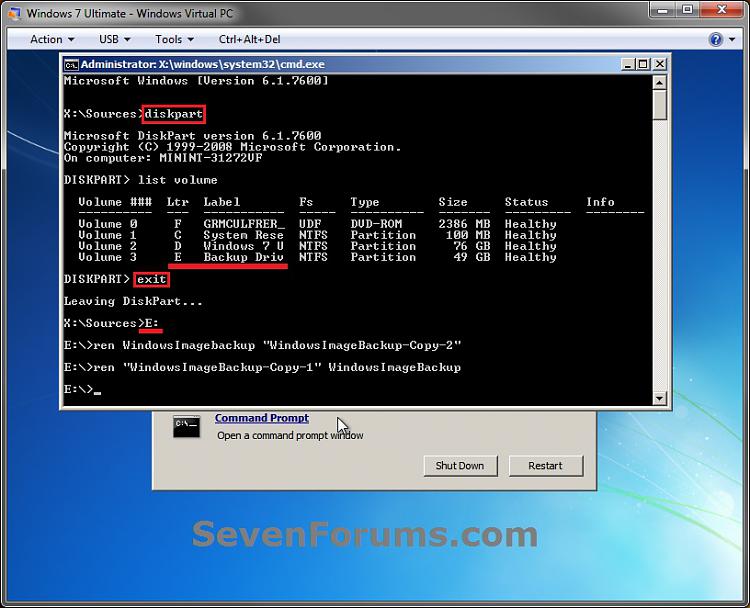
C) In the command prompt, type diskpart and press enter. (see screenshot below)
D) In the command prompt, type list volume and press enter. (see screenshot below)
E) Make note of the drive letter (ex: E: ) that you have the system image backup saved to.
F) In the command prompt, type exit and press enter. (see screenshot below)
G) In the command prompt, type the E: and press enter. (see screenshot below)
NOTE: Subsititute E: for your actual drive letter at step 2E instead.
H) If you already have a folder named "WindowsImageBackup"
NOTE: This is if you already have a folder named WindowsImageBackup that is not the system image version that you want to restore. If so, you would need to rename it to say WindowsImageBackup-Copy-2 as an example.
- In the command prompt, type the command below and press enter. (see screenshot below)
NOTE: Substitute WindowsImageBackup-Copy-2 in the command below with any name in quotes that you would like to rename it to instead.I) In the command prompt, type the command below and press enter. (see screenshot below)Code:ren WindowsImageBackup "WindowsImageBackup-Copy-2"
NOTE: Substitute WindowsImageBackup-Copy-1 in the command below with the actual name of your renamed system image folder in quotes that you want to use to restore instead.Code:ren "WindowsImageBackup-Copy-1" WindowsImageBackup
J) Close the command prompt window. (see screenshot below)
K) Continue on to step 3B in the STEP TWO section below to do the System Image Recovery.
 STEP TWO
1. If you have the system image backup save to an external device, be sure that it is connected and turned on (powered up) now.
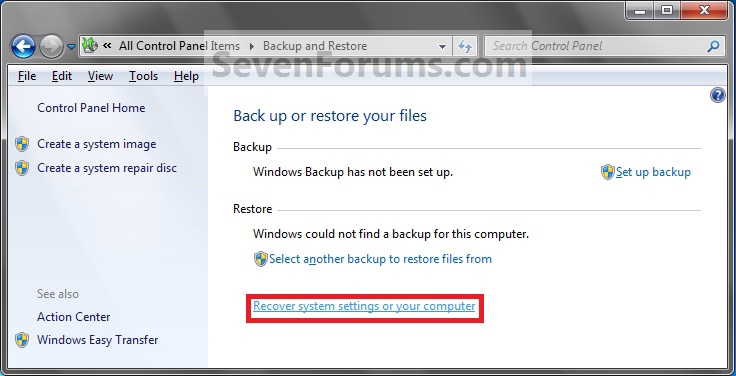
A) Start with either step 2 or step 3 below first.2. From "Backup and Restore" in the Control Panel while in Windows 7A) Open the Control Panel (icons view), and click on Backup and Restore.3. From the System Recovery Options Screen at Boot
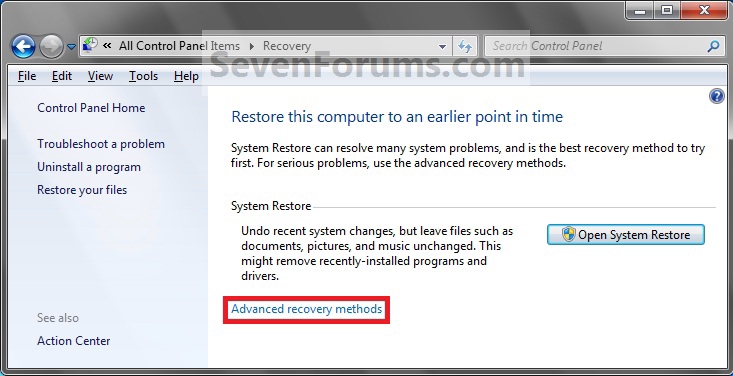
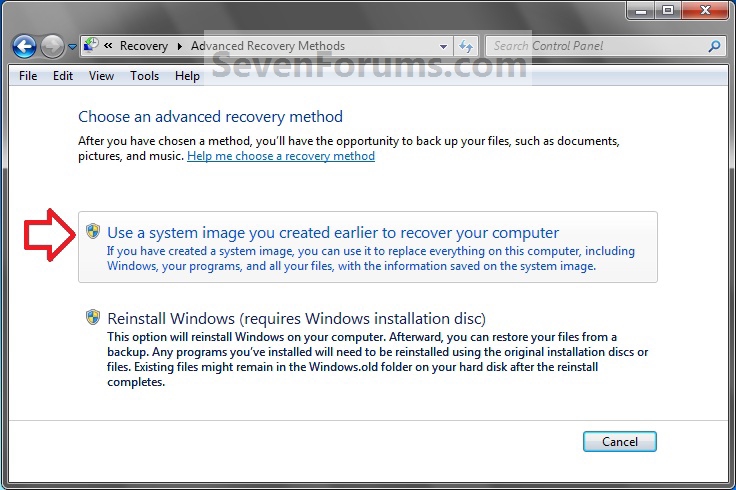
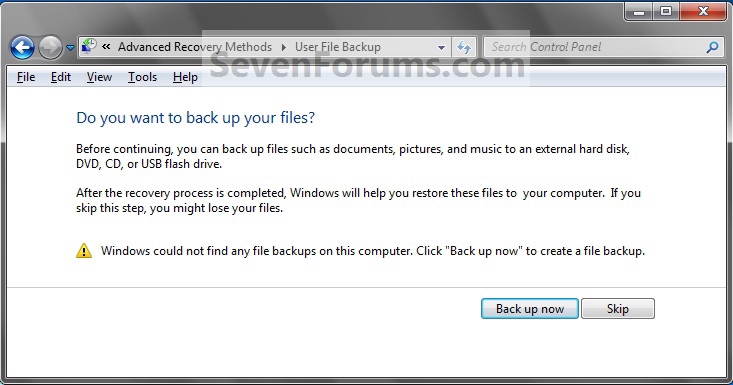
B) Click on the Recover system settings on your computer link. (see screenshot below)C) Click on the Advanced recovery methods link. (see screenshot below)D) Select the Use a system image you created earlier to recover your computer option. (see screenshot below)E) Select to either create a Back up now, or to Skip it and continue the system image recovery without backing up any of your current files.
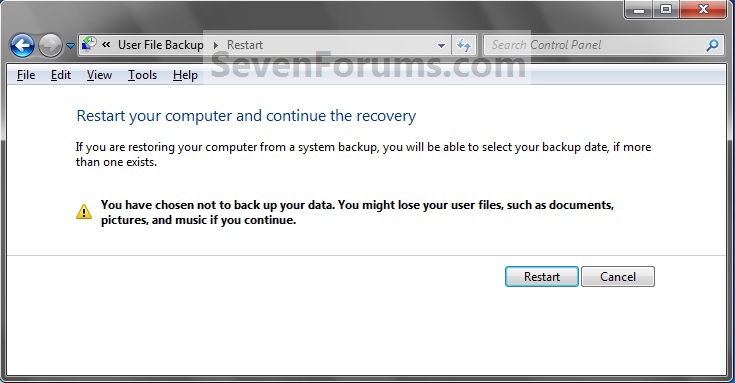
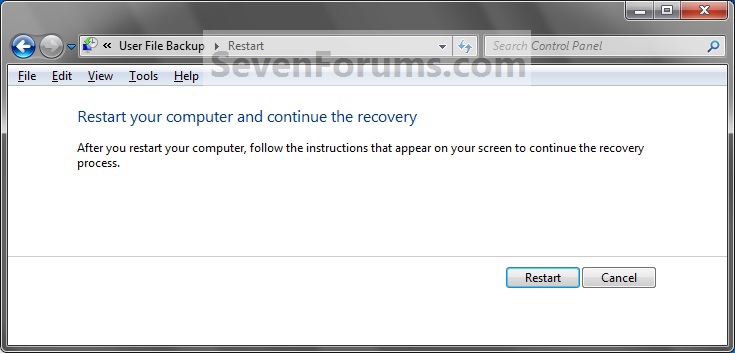
NOTE: If you select Back up now, it will take you to step 6 in this tutorial link to create a User and System File back up of your current files first before continuing to step 1F. (see screenshot below)F) Click on Restart. (see screenshot below)G) Select a languange to be used for your keyboard input and click on Next. (see screenshot below)H) Go to step 4.A) Boot to the System Recovery Options screen from your Windows 7 installation DVD/USB, or System Repair Disc.4. If you saved the system image backup to a set of DVDs, then insert the last DVD from the set when prompted. If not, go tostep 5 for a system image backup on a hard drive.
B) Select the System Image Recovery option. (see screenshot below)A) Go to step 7 below.5. To Use the Latest System ImageA) Select (dot) Use the latest available system image and click on Next. (see screenshot below)B) Go to step 7.6. To Select a System ImageA) Select (dot) Select a system image, and click on Next. (see screenshot above)
NOTE: This is if the system image that you want to use is not listed here and is at another location that you wish to choose from instead.
B) Select the location of the backup image for the computer you want to restore from the list, and click on Next. (see screenshot below)
Note
To add a image from a network location, click on the Advanced button, and on the Search for a system image on the network option.
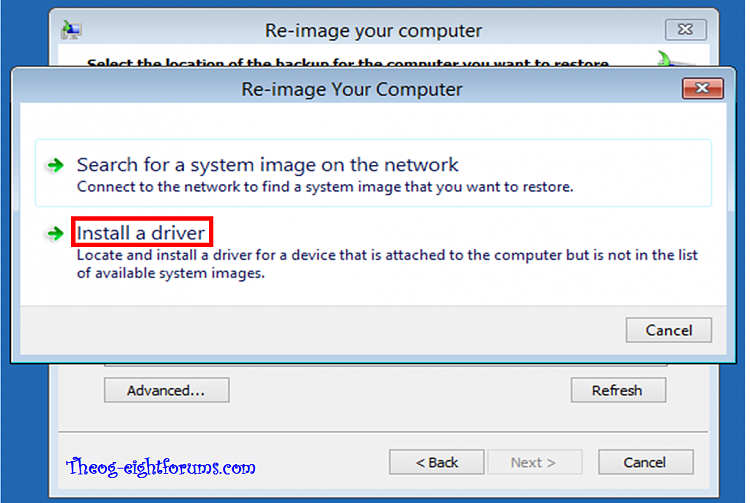
If the drive cannot be seen to select a system image from, then you may need to use the tutorial below to load your SATA or RAID drivers before it will be seen. You would click on the Advanced button, and on theInstall a driver option.
SATA Drivers - Load in Windows 8 System Image Recovery7. To Do a Full System Image RecoveryC) Select the date and time of the system image to restore, and click on Next. (see screenshot below)
NOTE: This option will format everything on each hard disk drive that was included in the system image, then restore them as they were when the system image was created.
Note
Format and repartition disks box:
NOTE: Special thanks to MJF for this addition.1) Grayed out and selected
You are forced to have the whole disk formatted and repartitioned to match the partition structure of the disk the image was made from. This can occur when restoring an image to a new disk or the original disk with a modified partition structure. Data on other partitions on the disk you are restoring to will be lost.
2) Grayed out and unselected
You are not given the option to format and repartition the disk. This will occur if you are restoring Windows from a partition on the same disk.
3) Not grayed out and unselected
Here you have the option to select format the whole disk and repartition or not. In this case the disk the image was taken from has a matching partition structure to the disk you are restoring the image to. By not selecting the format and repartition option your image will be restored and other partitions untouched such as valuable data partitions.A) Check the Format and repartition disks box (if not grayed out) and uncheck Only restore system drives box(if available), and click on Next. (see screenshots below)8. To Only Restore System Drives in System Image RecoveryB) Go to step 10.
NOTE: When restoring to the same disk containing data partitions, the Format and repartition disks option may format the data partitions as well. If this is the case and you have the option to leave the Format and repartition disks box unchecked, then initially attempt your image recovery with the Format and repartition disks box unchecked. If recovery is unsuccessful, repeat the process with the format box ticked.A) If available, check the Only restore system drives box, and click on Next. (see screenshot below)9. To Exclude Restoring Specific Drives in System Image RecoveryB) Go to step 10.
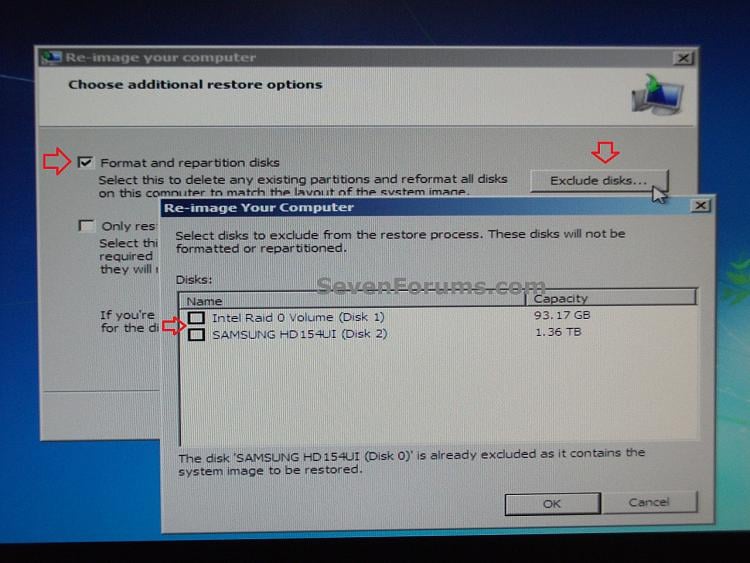
NOTE: Since a system image recovery will format everything on each hard disk drive that was included in a system image, this will allow you to exclude specific disks so that specific disk will not be formated or restored.A) Check the Format and repartition disks box , and click on the Exclude disks button (if not grayed out). (see screenshot below)10. Click on Finish. (see screenshot below)
NOTE: If the Exclude disks button is grayed out, then the HDD that you are restoring to is empty, or you do not have any disks in the system image that are able to be excluded from being restored.B) Unselect the drives that you want to exclude from being restored.
C) Click on Next.11. Click on Yes. (See screenshot below)12. You will now see this screenshot below.
NOTE: If you have the backup image on DVDs, have them ready. See step 4 above.13. When it is through, click on Restart Now to finish. (see screenshot below)
NOTE: Your computer will restart and the backup image restoration will be done.14. If you created a backup in step 1E, then you will now see this option to Restore my files after the computer restarts. (see screenshot below)
That's it,
Shawn
